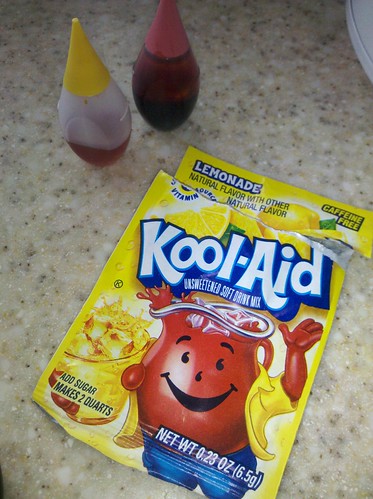
To start with the dyes used:
Lemonade Kool-Aid
Pink McCormacks
Yellow McCormacks
The lemonade is the "acid" needed to bind the dye but yellows only need very little so one packet can be enough for the yellow plus added yellow. I'll get to the pink later.
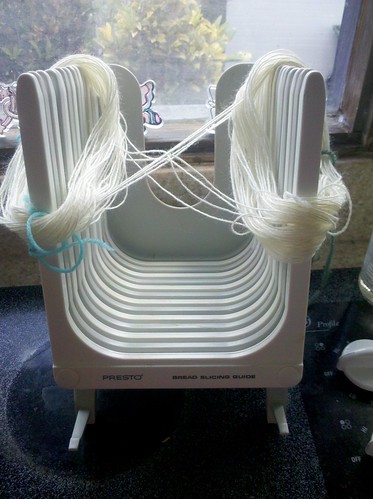
I made self striping by wrapping around the 2 sides of my bread cutter. It is rather easy and if you don't have one you can always just take 2 boxes and wrap around one about 10 to 30 times then go to the other box and wrap 10 to 30 times on that box. you effectively make 2 skeins with a few strands connecting them. Tye each half with way more tyes than you think you will need... the tangles with self striping are way worse than with normal skeins... don't ask how I know...
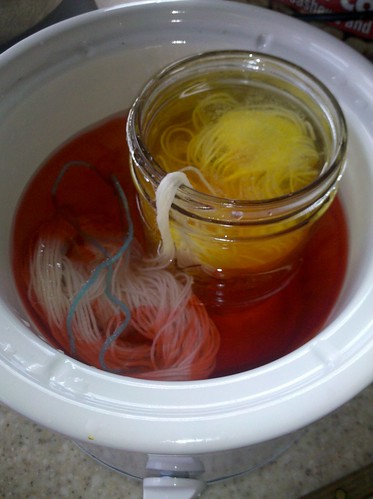
The yarn soaks in a crock pot and is heated before I add any colors or acid. You will need to soak the whole think even the part linking the 2 colors or you will not get the red 3 to strike... ever. As you see the yellow powder is just dumped in, and I swish it around with a spoon (hot water), but only just a swish, heat helps move the dye faster so I just don't want the dye sitting ON the yarn or it will be unevenly dyed.I did not add acid to the pink... I let it just sit, some areas actually have slightly acidic water and this can be enough for the red 3 to strike the yarn... I don't have that, but all the same the adding of acid directly can screw up the dyeing process.
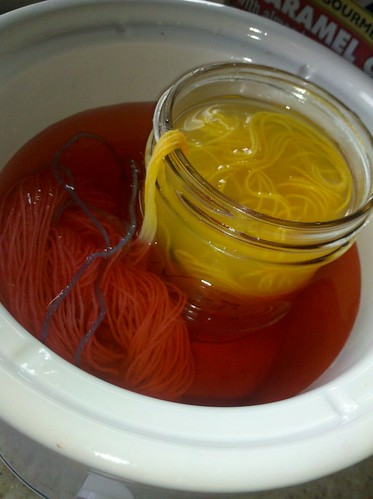
Ok, this picture is AMAZING... why? because this is the REASON I do not have to worry about red 3. I supersaturated the yellow water... WAY supersaturated it with dye... in fact there is so much dye in it I do not even need to MOVE the yarn and the yarn not covered in liquid is being dyed yellow. This is because the liquid (and the acid in the liquid) is being wicked from the higher water level to the lower water level. Once the the water level is equal no more adjustment will happen and the wicking will stop. The red 3 is really touchy and will strike the yarn when the acid is JUST right and won't get to that too acidic stage. Now a word to the wise, you will need to add more acid (vinegar in my case) but ALWAYS add to the yellow jar (or any other color so long as it isn't red 3).
(I did supersaturate on purpose to demonstrate the movement of the liquids... no need to do this yourself unless you WANT to wash a bunch of yellow or whatever color down the drain when rinsing... you don't? Then move the yarn to get the dye on it...)
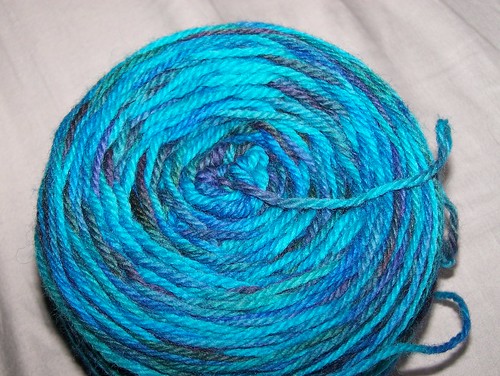
Want to see what I made with this yarn?